Install in IIS (Manual)
Cortex 2.0 and later require a read-write connection to a Cortex-specific data store. Synapse Software does not support having Cortex and any archive in the same database. They should always be two separate databases.
See the Connection Strings page for configuration details.
This page covers manual installation in IIS. For most deployments, the All-in-One Installer is the easier option and handles most of these steps automatically.
Prerequisites
- Windows Server with IIS installed
- Your database restored to a Microsoft SQL Server instance with Full-Text Indexing installed
- SQL Server connection information on hand
The IIS server does not need to be the same machine your source system ran on. Cortex only needs access to the database - the source application does not need to be running.
Step 1 - Enable WebSockets in IIS
- Open Add/Remove Windows Features.
- Under Internet Information Services > World Wide Web Services > Application Development Features, enable WebSocket Protocol.
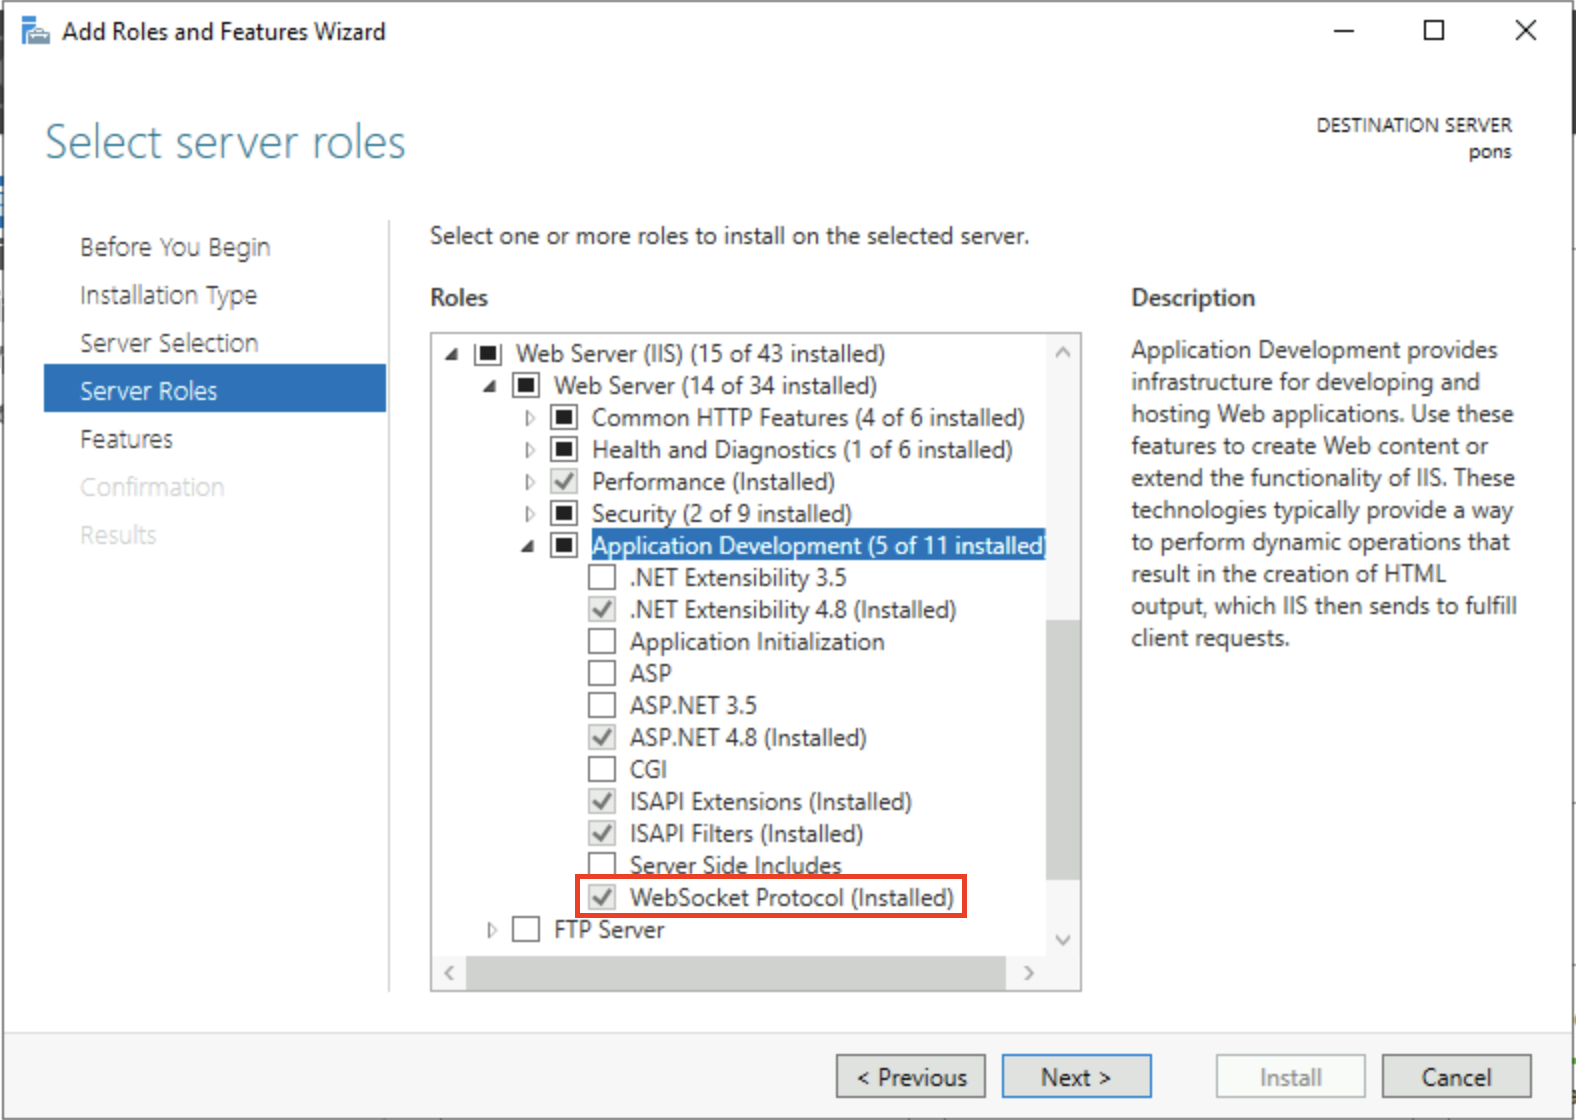
- Click OK and allow the feature to install.
Step 2 - Install the ASP.NET Core Hosting Bundle
Download and install the ASP.NET Core Hosting Bundle from Microsoft.
After the installer finishes, restart IIS before continuing. You do not need to restart the whole machine. Run the following in an elevated command prompt:
iisreset
Step 3 - Download Cortex
Download the appropriate build for your server from:
https://releases.synapsesoftware.com/
Available builds:
- win-x64 - (Recommended) Self-contained Windows build. No .NET runtime required.
- net9 - Runtime-dependent build. Requires .NET 9 installed on the server.
Extract the zip file to a location IIS can access, such as C:\ or C:\inetpub\. Ensure the IIS_IUSRS group has read access to the folder. Write access is not needed.
Step 4 - Create an Application in IIS
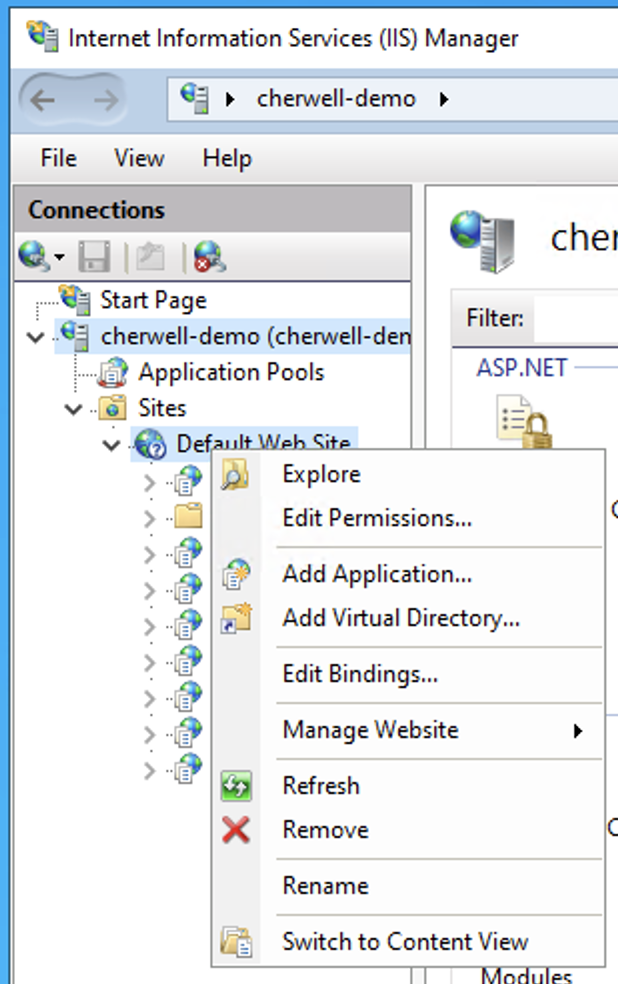
- Open Internet Information Services (IIS) Manager from the Start Menu.
- In the left panel, expand the tree until Default Web Site is visible.
- Right-click Default Web Site and choose Add Application.
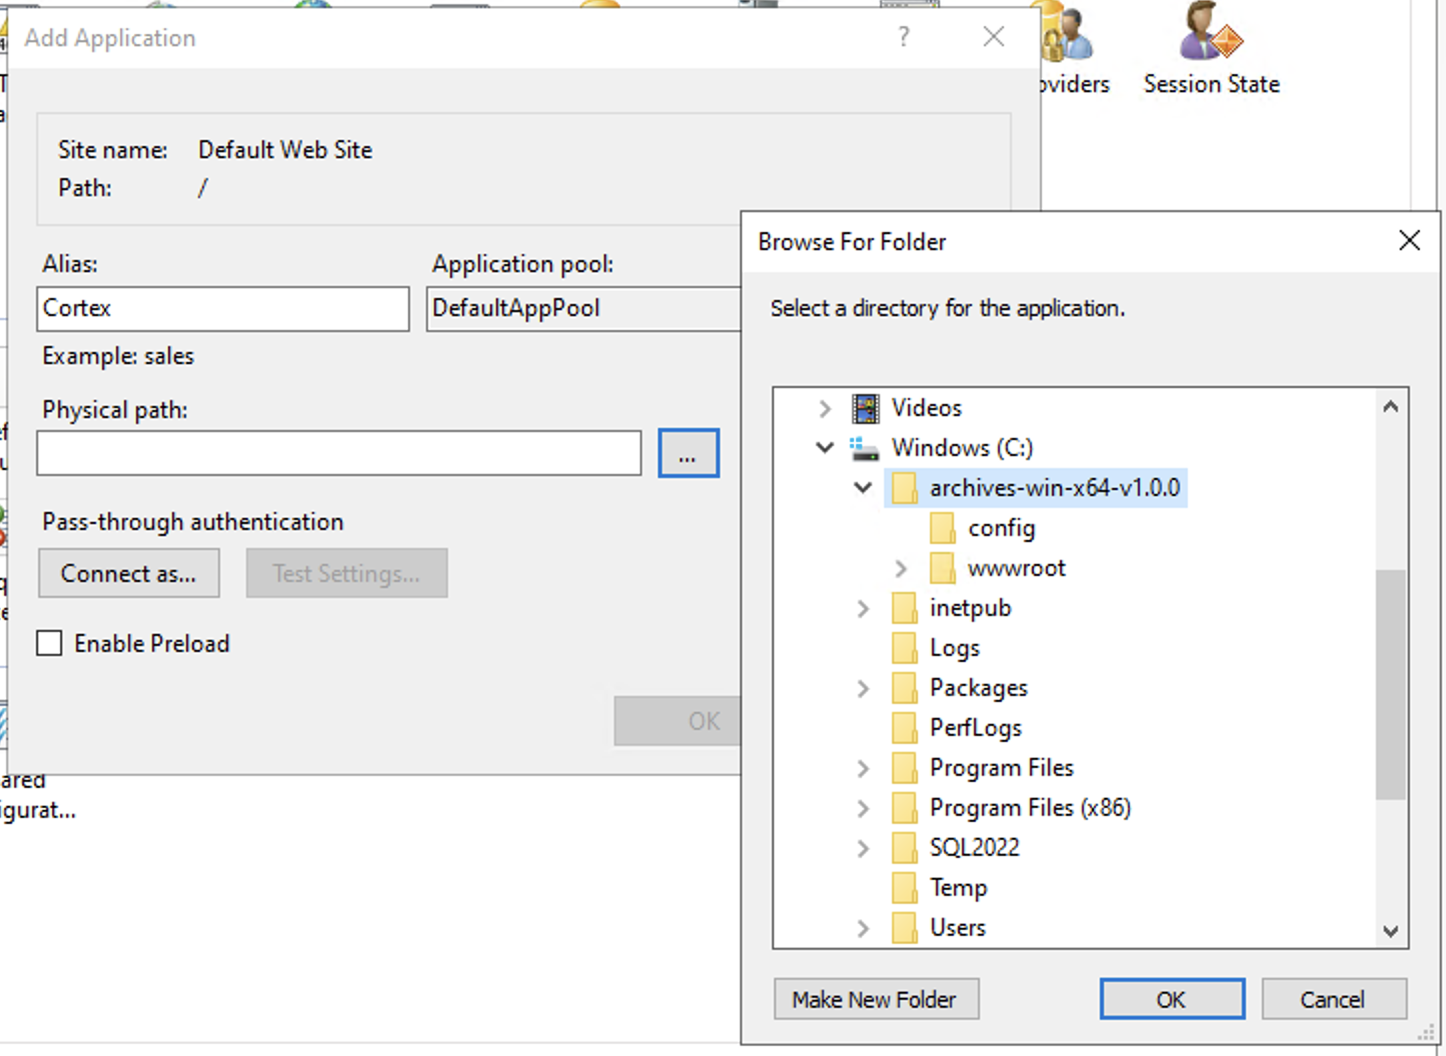
- Set Alias to
Cortex. This makes the app accessible athttp://YOUR_SERVER_NAME/Cortex. - Set Physical Path to the folder where you extracted Cortex. This should be the folder above
wwwroot. - Click OK.
Step 5 - Configure Cortex
Three items need to be configured before Cortex will run:
- A connection string pointing to your database
- Your Cortex license details
- An authentication method
Edit appsettings.json in the Cortex installation directory:
{
  "ConnectionStrings": {
    "Cherwell": "READ (WRITE OPTIONAL) CONNECTION STRING FOR CHERWELL DATA",
    "Cortex": "READ/WRITE CONNECTION STRING FOR CORTEX DATA"
  },
  "Licensing": {
    "CompanyName": "YOUR COMPANY NAME HERE",
    "LicenseCode": "YOUR LICENSE CODE"
  },
  "Authentication": {
    "Type": "none"
  }
}
Start with Authentication:Type set to none to verify your database connection before adding authentication into the mix. See the Next Steps section below for guidance on switching to a production authentication method.
After saving the file, restart the IIS Application Pool to apply the changes.
If you do not have a Cortex license, the application will run with search results limited to 10 records.
For connection string details, see: Connection Strings
Next Steps
HTTPS / SSL
If you are using SAML for authentication, HTTPS is required (or at minimum strongly recommended). If you add HTTPS after configuring SAML, you will need to update your SAML configuration to match.
Configuring HTTPS is highly recommended for any production deployment. How you do this depends on your environment - common options include a certificate installed directly in IIS, a certificate from an internal or external CA, or HTTPS termination at a reverse proxy in front of Cortex.
Your infrastructure team will be the best resource for this. We can offer guidance if we are familiar with your specific setup.
Authentication
In most cases, we recommend starting with Authentication:Type set to none to confirm your database connection is working before introducing additional variables.
Authentication:Type none is not suitable for production. Once you have confirmed connectivity, configure your preferred authentication method:
Leaving authentication set to none means all data is accessible to anyone who can reach the server. This mode is intended solely for initial setup and verification.
Troubleshooting
If Cortex does not load after installation, see: