v3.0.0: Import legacy Cherwell form settings
In older Cortex releases, there were several Cherwell form and expression rendering options, which were stored in the shared CortexSettings table. Now that there can be multiple Cherwell systems connected at the same time, current releases store those options directly on each Cherwell data source (alongside other archive settings).
If you upgrade to Cortex v3.0.0 from any previous release, you should run Cherwell settings import so each Cherwell archive picks up the same behavior you had before settings moved per data source. Most Cherwell customers who upgrade will want to run this.
A new installation of v3.0.0 with no previously configured system settings for the Cherwell connection does not need this step.
Who can do this
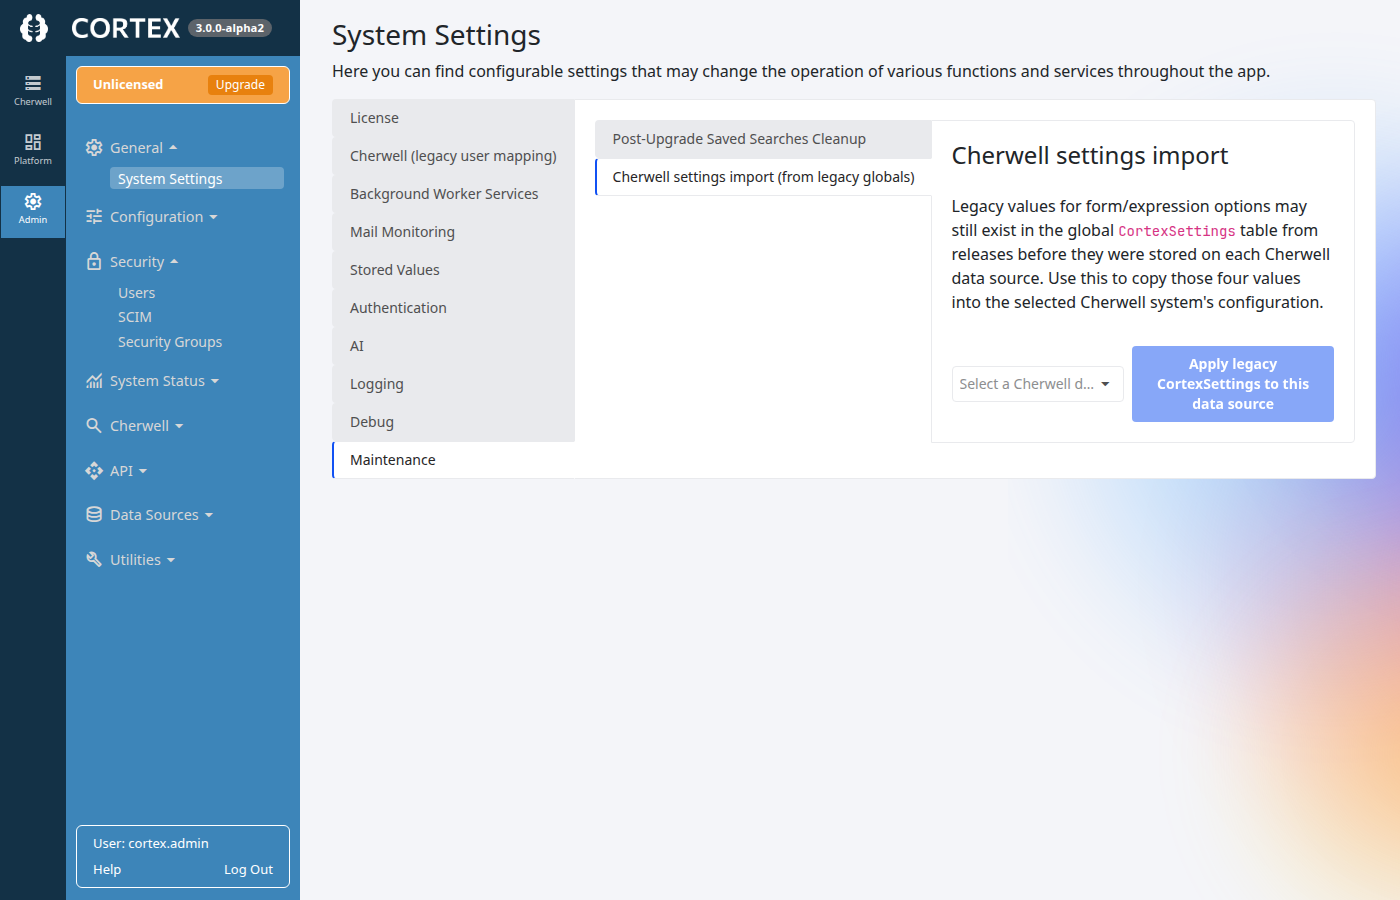
You must have Admin access in Cortex. The UI is under Admin → System Settings → Maintenance.
Visibility
The Cherwell settings import (from legacy globals) tab appears only when all of the following are true:
- Your license includes Cherwell archives.
- At least one enabled Cherwell data source exists.
- Cortex can reach that Cherwell database and detect Cherwell system tables.
If the tab is missing, confirm Cherwell connectivity and that the data source is enabled; see Connection strings and your Cherwell SQL environment.
Steps
- Open Admin → System Settings.
- Select Maintenance.
- Open Cherwell settings import (from legacy globals).
- Pick the Cherwell data source that should receive the legacy values.
- Click Apply legacy CortexSettings to this data source.
Cortex copies four legacy global settings into that data source’s specific configuration and saves.
After import
Review form rendering and expression-related behavior in Cortex against that Cherwell system.