Renaming a Cortex Server
If you rename the server Cortex Archive runs on - for example, to bring it in line with a production naming standard - the application does not pick up the new address automatically. If you use SAML authentication, two separate configurations still point to the old address and must be updated by hand, or logins will fail after the rename.
Step 1 - Rename the Server
Rename the server and update DNS as you normally would for any Windows Server. If Cortex is running in IIS, also update the site binding's hostname if one is set.
This step is standard Windows Server / IIS administration and is not specific to Cortex.
Step 2 - Update the Public URI in Cortex System Manager
Cortex stores the address it identifies itself as separately from the server's actual hostname. After the rename, this still points to the old address and needs to be updated manually.
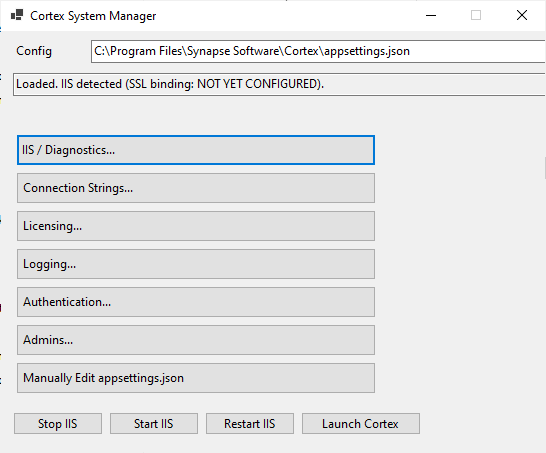
- Open Cortex System Manager. You can find it from the desktop shortcut, or by running
Cortex.Config.exedirectly from the Cortex installation directory. - Click Authentication....
- Update the Public URI field to the new address (for example:
https://devSrv.example.com/cortexturning intohttps://OurProdServer.example.com/cortex).
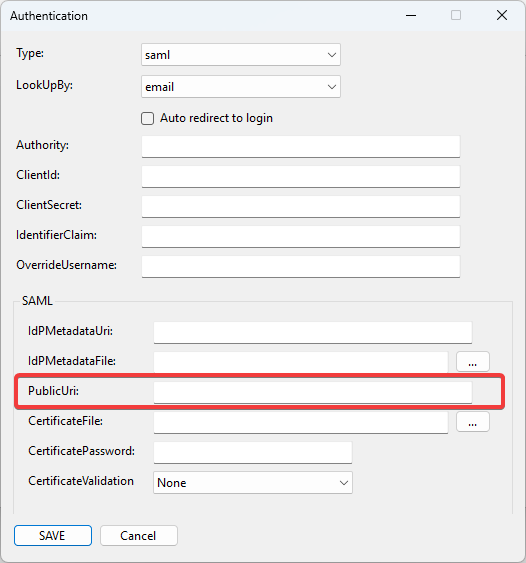
- Click Save, then restart Cortex.
This is the same setting documented as Authentication:Saml:PublicUri in the SAML configuration guides.
Step 3 - Update Your Identity Provider
If you use SAML, your identity provider (ADFS, Azure AD, Okta, or Google Workspace) still has the old address configured as the relying party identifier and redirect (ACS) endpoint. Update it to match the new Public URI:
Both the Cortex Public URI and the identity provider's configuration must match exactly, including https vs http, hostname, and any trailing slash.
Troubleshooting
If SAML logins fail after a rename, see: